How do I install a resistor in an enclosure for DIN rail mounting?
Jul 03, 2025
Installing a resistor in an enclosure for DIN rail mounting is a common task in electrical and electronic installations. As a supplier of Enclosure For Din Rail Mounting, I've had extensive experience with this process and would like to share a comprehensive guide on how to do it effectively.
Understanding the Basics
Before we delve into the installation process, it's crucial to understand what a DIN rail is and why it's used. A DIN rail is a standardized metal rail, typically made of steel, used for mounting electrical and electronic components in control panels, switchboards, and enclosures. It provides a convenient and modular way to organize and secure various devices.
Resistors, on the other hand, are passive two - terminal electrical components that implement electrical resistance as a circuit element. They are used to control current, divide voltages, and dissipate power in electronic circuits.
Selecting the Right Enclosure
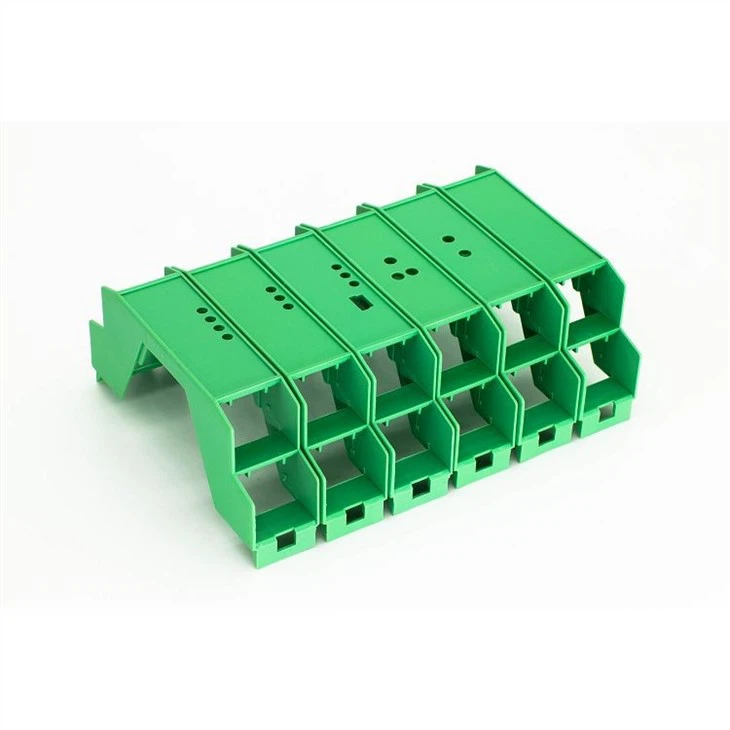
The first step in installing a resistor in a DIN - rail enclosure is to choose the appropriate enclosure. At our company, we offer a wide range of enclosures suitable for different applications. For instance, the Din Rail PCB Enclosure is ideal for mounting printed circuit boards along with resistors. It provides a compact and protected environment for the components.
If you need to isolate signals while mounting the resistor, the Signal Isolation Box is a great option. It helps in preventing electrical interference and ensures the proper functioning of the resistor and other connected devices.
For applications where you need to connect multiple electrical terminals along with the resistor, the Electrical Terminal Block Connector Enclosure Housing is designed to accommodate terminal blocks and resistors securely.
Tools and Materials Required
To install a resistor in a DIN - rail enclosure, you'll need the following tools and materials:
- Resistor: Select a resistor with the appropriate resistance value, power rating, and tolerance for your application.
- Enclosure: Choose the right DIN - rail enclosure as described above.
- Mounting Hardware: This may include screws, nuts, and washers for securing the resistor and the enclosure to the DIN rail.
- Soldering Iron and Solder: If the resistor needs to be soldered to the circuit board or other components.
- Wire Strippers and Cutters: For preparing the wires for connection.
- Multimeter: To test the resistor's value and the circuit's continuity.
Step - by - Step Installation Process
Step 1: Prepare the Enclosure
First, ensure that the DIN - rail enclosure is clean and free from any debris. If the enclosure has removable covers or panels, remove them to access the internal mounting area.
Step 2: Mount the Enclosure on the DIN Rail
Most DIN - rail enclosures are designed to snap onto the DIN rail easily. Align the enclosure with the DIN rail and apply pressure to snap it into place. Make sure it is firmly attached and does not move freely on the rail.
Step 3: Position the Resistor
Decide where you want to mount the resistor inside the enclosure. Consider factors such as accessibility for future maintenance, heat dissipation, and clearance from other components. If the resistor is to be mounted on a printed circuit board, align it with the appropriate holes or pads on the board.
Step 4: Secure the Resistor
If the resistor has mounting holes, use screws, nuts, and washers to secure it in place. Make sure not to overtighten the screws, as this could damage the resistor. If the resistor is to be soldered, carefully place it on the circuit board and solder the leads using a soldering iron.
Step 5: Connect the Wires
Strip the ends of the wires that will be connected to the resistor. Use wire strippers to remove about 1/4 to 1/2 inch of insulation from the wire ends. Then, connect the wires to the resistor terminals. You can use crimp connectors, solder joints, or terminal blocks depending on your application.
Step 6: Check the Connections
Use a multimeter to check the continuity of the connections. Set the multimeter to the resistance mode and measure the resistance across the resistor. The measured value should be close to the rated value of the resistor within its tolerance range.

Step 7: Close the Enclosure
Once you are satisfied with the resistor installation and the connections, replace the removable covers or panels of the enclosure. Make sure they are properly sealed to protect the components from dust, moisture, and other environmental factors.
Safety Considerations
When installing a resistor in a DIN - rail enclosure, it's important to follow safety guidelines:
- Power Off: Always turn off the power supply before working on the electrical circuit to avoid electric shock.
- Proper Ventilation: If the resistor dissipates a significant amount of heat, ensure that the enclosure has proper ventilation to prevent overheating.
- Insulation: Use insulated tools to avoid short - circuits and electrical hazards.
Troubleshooting
If you encounter any issues during or after the installation process, here are some common problems and solutions:
- High Resistance Reading: If the measured resistance is much higher than the rated value, check for loose connections, damaged resistor leads, or a faulty resistor.
- Low Resistance Reading: A lower - than - rated resistance may indicate a short - circuit in the connections or a damaged resistor.
- Overheating: If the resistor gets too hot during operation, check the power rating of the resistor. It may be under - rated for the application. Also, ensure proper ventilation in the enclosure.
Conclusion
Installing a resistor in an enclosure for DIN rail mounting is a straightforward process if you follow the right steps and use the appropriate tools and materials. As a supplier of Enclosure For Din Rail Mounting, we are committed to providing high - quality enclosures that meet your specific needs. Whether you need a simple DIN - rail PCB enclosure or a more advanced signal isolation box, we have the products to ensure the successful installation of your resistors and other electrical components.
If you are interested in purchasing our DIN - rail enclosures or have any questions about the installation process, please feel free to contact us for procurement discussions. We look forward to serving you and helping you with your electrical and electronic installation projects.
References
- Electrical Installation Handbook, Schneider Electric
- Electronic Components and Circuit Theory, Robert L. Boylestad